
Posted on October 30, 2018
Using SQL to query DynamoDB with Data Pipelines and s3
DynamoDB allows some basic querying out of the box based on the primary key and global secondary indexes. It also allows scanning with filters. Other than that, the functionality is pretty limited. There is some setup required, but it is possible to run SQL queries against a snapshot. This is useful for many use cases such as quickly troubleshooting issues.
At a high level the steps are
- Export DynamoDB to S3 using data pipelines in AWS
- Clean up extraneous files in the S3 folder
- Set up athena against the S3 folder
- Run the queries in athena
Step 1
Navigate to the AWS console and select Data Pipeline. From there click “Create Pipeline” in the upper left
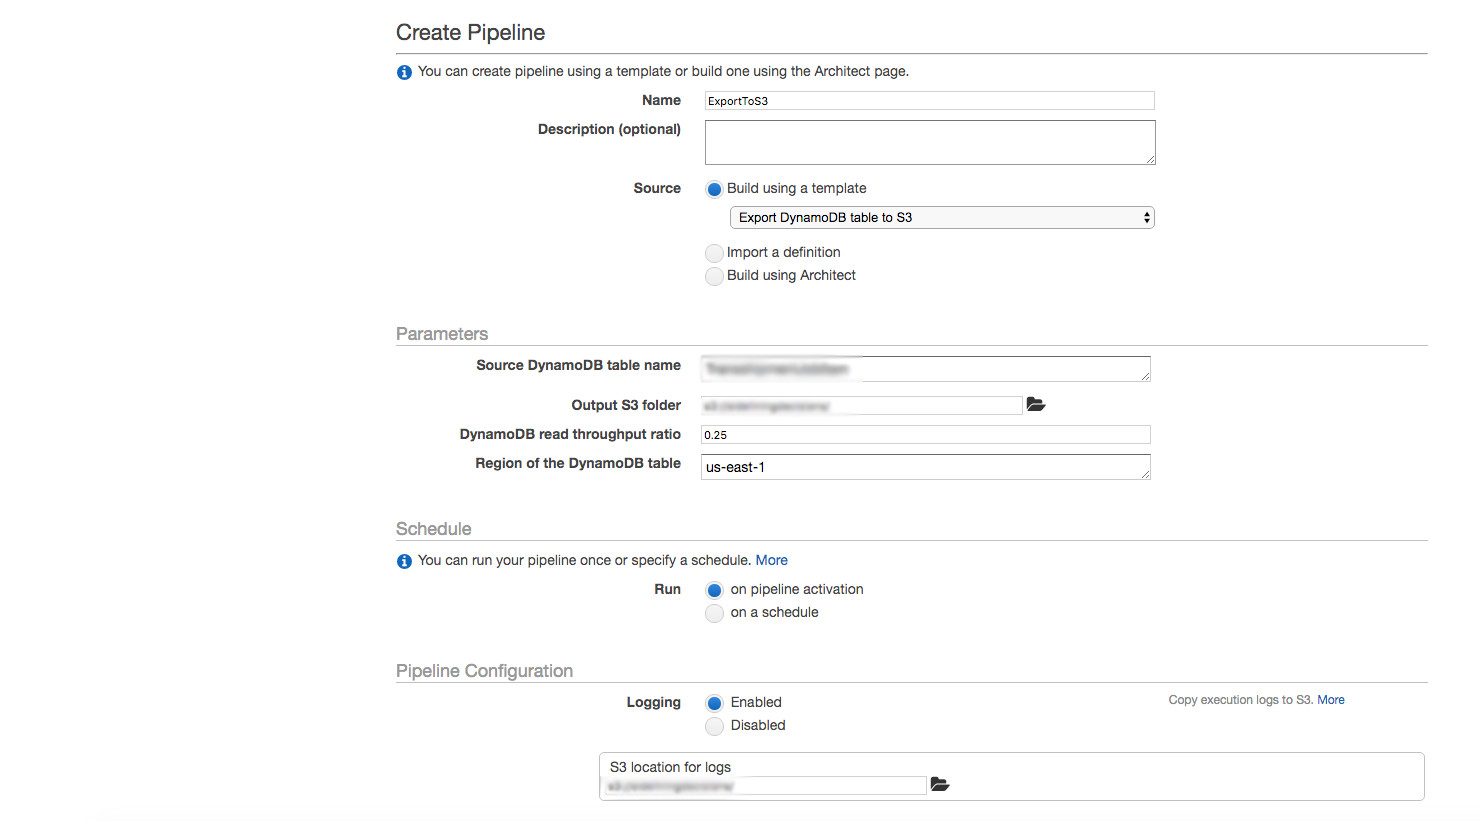
Specify the Source DynamoDB table name, the output S3 folder (where the exported DB will be saved to), and the S3 location for logs (log files for the export operation). The log location is optional, you can disable logs. Its a one time operation, so unless it fails the logs aren’t really needed. Run on pipeline activation – we are taking a one time snapshot.
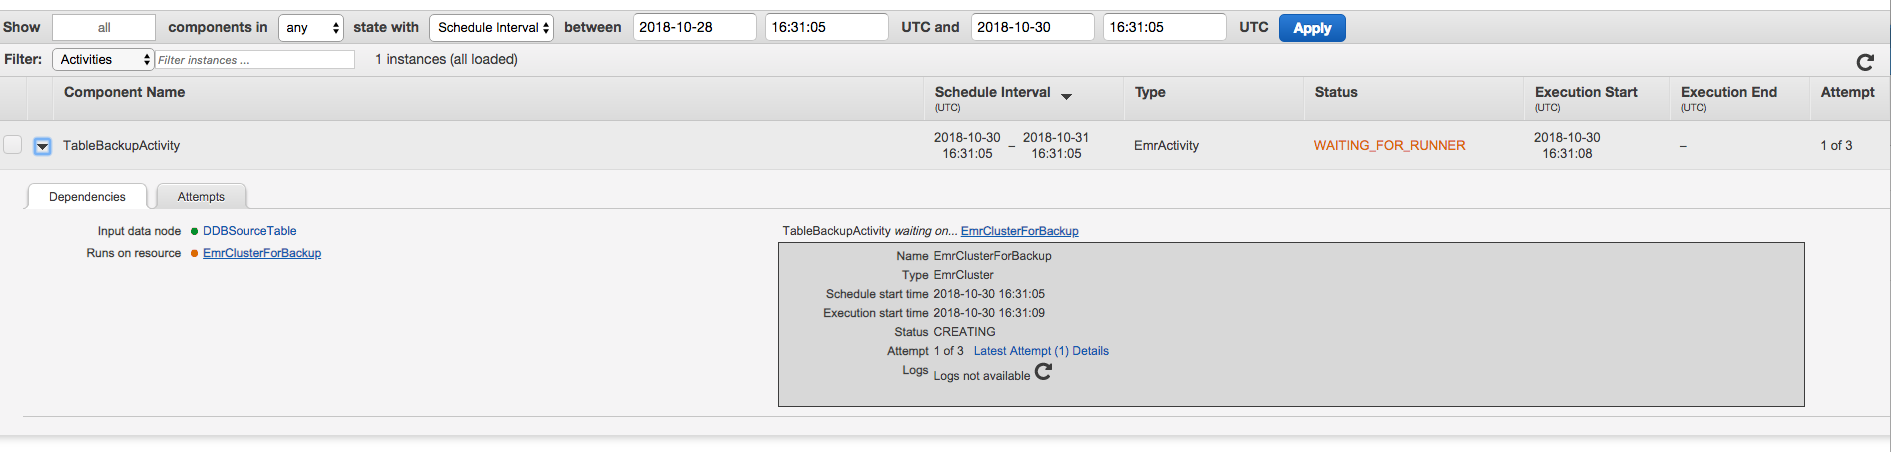
Click “Activate” and then wait for the pipeline to finish running. For subsequent runs, you can come back to the list of pipelines, select it, and click on “Rerun”. Wait for the pipeline activity to finish running.
Step 2.
Once its done, you will see the newly created export on the s3 folder location you specified – a subfolder will appear under that location with the date of the run. For example, “2018-10-30-16-31-05”.
Unfortunately, some additional files are written out that will cause issues when querying in Athena unless deleted first, specifically manifest and _SUCESS: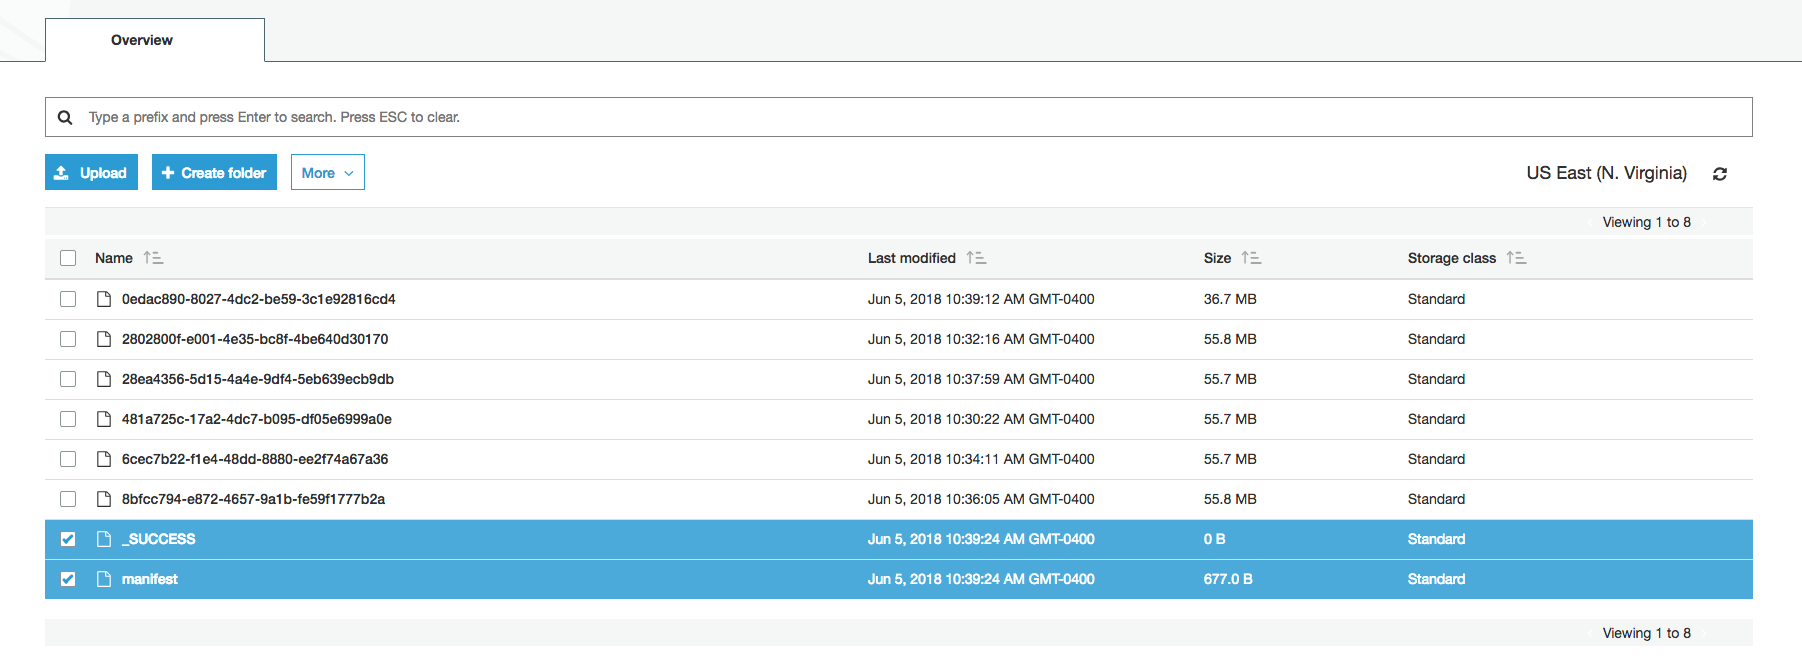
“manifest”s a file that contains a list of all the files exported to s3 by the job and their locations:
{“name”:”DynamoDB-export”,”version”:3,
“entries”: [
{“url”:”s3://YourS3Bucket/2018-10-30-16-31-05/4b9822ff-42d5-4509-b08b-4186c62a7480″,”mandatory”:true},
{“url”:”s3://YourS3Bucket/2018-10-30-16-31-05/b524ae05-9184-43f4-8702-c974fe1c0611″,”mandatory”:true}
]}
The _SUCCESS file is empty and self explanatory.
Delete both files. Not doing so will result in explicable errors in Athena, as it queries all the files in the S3 folder, and is not able to skip the aforementioned files, resulting in failure.
Step 3
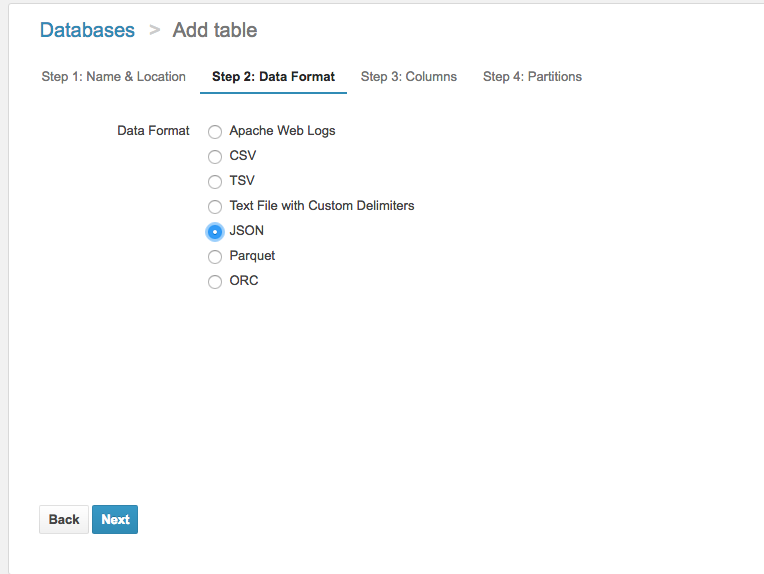
Open Athena in the AWS console. On the left hand pane, under database -> tables, select Add table. This will open up a wizard that will then create a table from the s3 files. Alternatively, you can just use create table syntax.

For Database, you can create a new one, or select default. Since these are snapshots, I typically create a new database everytime I am querying a new DynamoDB table. That way, for subsequent snapshots of the same table, I dump them into the same Athena database.
Enter table name, I typically name it with the snapshot date plus “Snapshot”.
Finally enter in the s3 folder where the backup is located. If the data pipeline exported the files to s3://SomeBucket/2018-10-30-16-31-05/ that’s what you would enter in.
Click next step. Choose JSON for the data format.
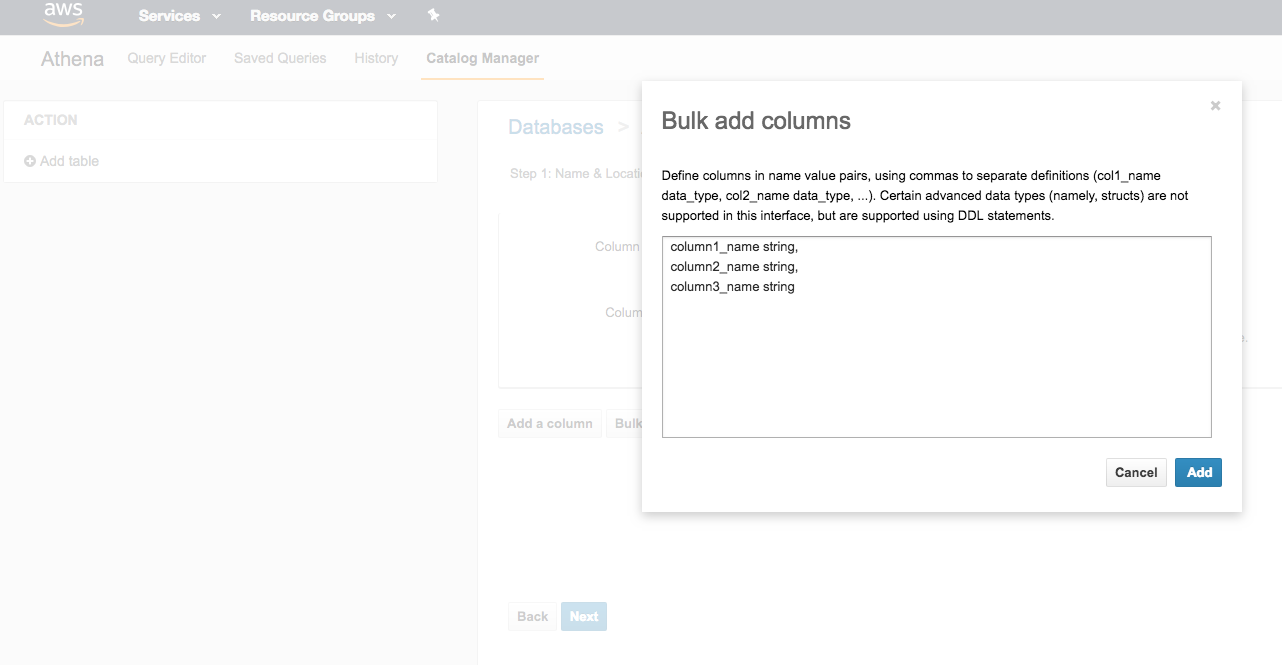
Click next. This part is a little unintuitive because data pipeline exports all your data as a string, regardless of the data type. This will make sense later when I show the queries. You can enter columns in one by one or in bulk by specifying a comma separated list of key value pairs, where key is the column name, and value is always “string”.
For example:
column1_name string,
column2_name string,
….
columnN_name string
Finally you can skip Step 4 Partitions and choose create table.
NOTE – Athena uses a bucket to store query results, so if you’ve used up all 100 buckets you will get an error:
You have attempted to create more buckets than allowed (Service: Amazon S3; Status Code: 400; Error Code: TooManyBuckets; (Service: AmazonAthena; Status Code: 400; Error Code: InvalidRequestException)
Alternatively, if you want to skip the UI wizard and directly create a table, you can open the query editor and run:
CREATE EXTERNAL TABLE IF NOT EXISTS yourDBName.YourTableName (
`column1_name` string,
`column2_name` string,
`column3_name` string
)
ROW FORMAT SERDE ‘org.openx.data.jsonserde.JsonSerDe’
WITH SERDEPROPERTIES (
‘serialization.format’ = ‘1’
) LOCATION ‘s3://yourS3Bucket/2018-10-30-16-31-05/’
TBLPROPERTIES (‘has_encrypted_data’=’false’);
Step 4
Query. As mentioned previously, the data is exported in a JSON format, so you’ll have to modify your queries slightly. Every column value is stored as a JSON object with a key of “s” (for string) and then the actual value.
So if you wanted to query some table for all distinct values of “foo” with createdDate in between July 5th and July 7th with a status of “COMPLETE”, it would actually look like this:
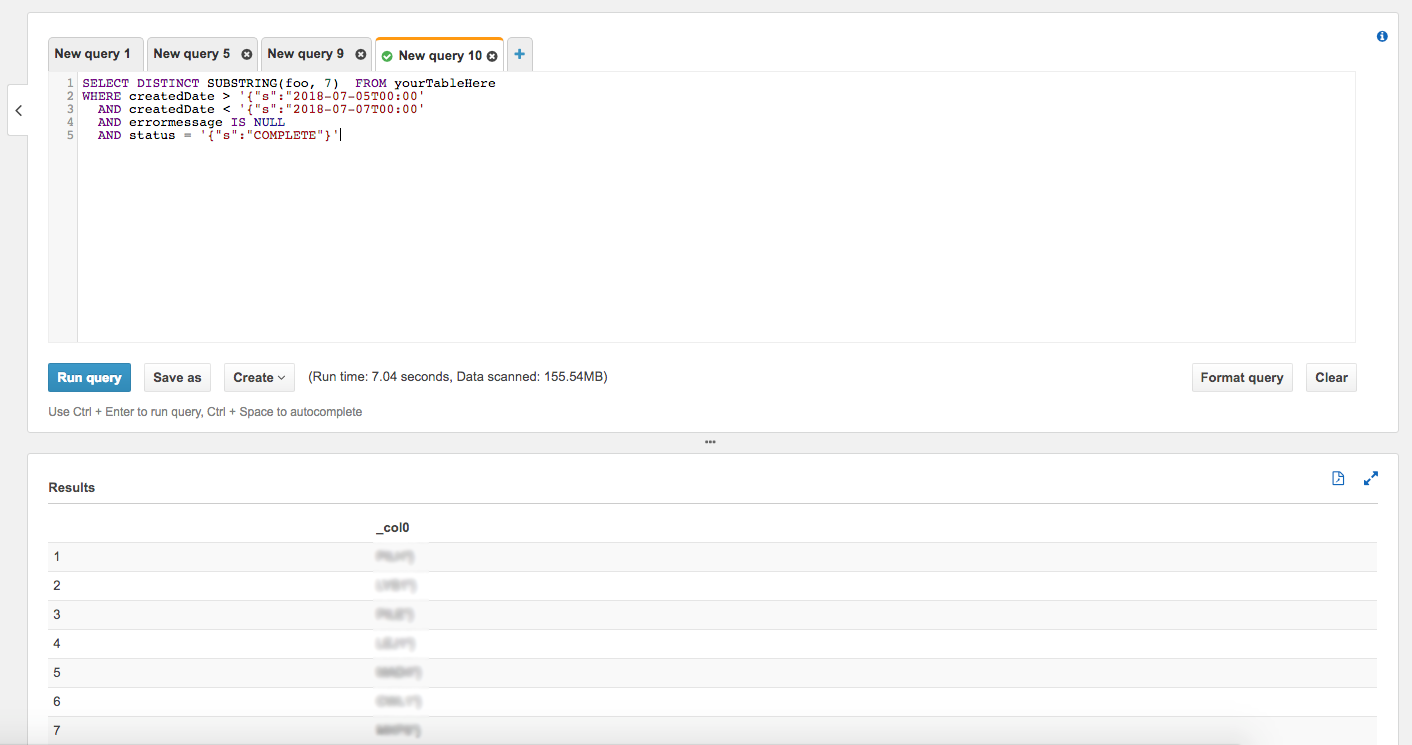
And that’s it!
One final follow up:
If you didn’t do the step of removing the extra manifest and _SUCCESS file you will run into strange errors such as “HIVE_CURSOR_ERROR: Row is not a valid JSON Object – JSONException: A JSONObject text must end with ‘}'”
