
Posted on July 8, 2014
Scalatra tutorial (Part 1): Setting up a barebones “Hello world” REST API
I went through the exercise of setting up a Scalatra web API on my MacOS X for work. There are lots of guides out there, most of which use pre-existing projects on Github as a starting point. The official Scalatra documentation does this, although I ran into issues trying to follow their instructions (it seems to work fine when using Ubuntu but not with Mac). I used these guides as a reference, but I wanted to start from scratch and build out a simple GET endpoint that returned “Hello World” using the least amount of code possible. The following is a guide on how to do exactly that. The goal was to familiarize myself with how Scalatra APIs are structured and build upon that foundation.
I used Mac OS X (Mavericks) and IntelliJ (13.1) with the SBT and Scala plugins. The SBT plugin is optional, as you can use homebrew to install SBT and run the API from the command line. Most of the skeleton frameworks on github have an SBT bash script in the project root directory which unpacks and runs the SBT jar file (typically found under the project folder underneath the project root directory). Keep in mind that is why most documentation tells you to run the SBT commands using “./sbt”. The homebrew install adds SBT to your path, so you can simply type “sbt” instead.
If you want to follow along in github, you can check the sample project out at https://github.com/jieyangh/scalatra-sample-API. The hash for part 1 is 6c66a3df87ab321fa736f6ab0a819cb16d8e039e
Let’s get started!
Install Scala:
brew install scala
Install SBT (optional):
brew install sbt
SBT is a simple build tool, analagous to maven. Typically in most projects, there is a bash shell script with the same name in the project root that runs the sbt jar file (typically located in the project directory, and run via “./sbt”. If you install with brew or opt for a manual install, you can just type “sbt” instead). It is typically used to generate the project idea file, update dependencies, and launch the application. However, the IntelliJ plugin makes this un-necessary though, so you can skip this step.
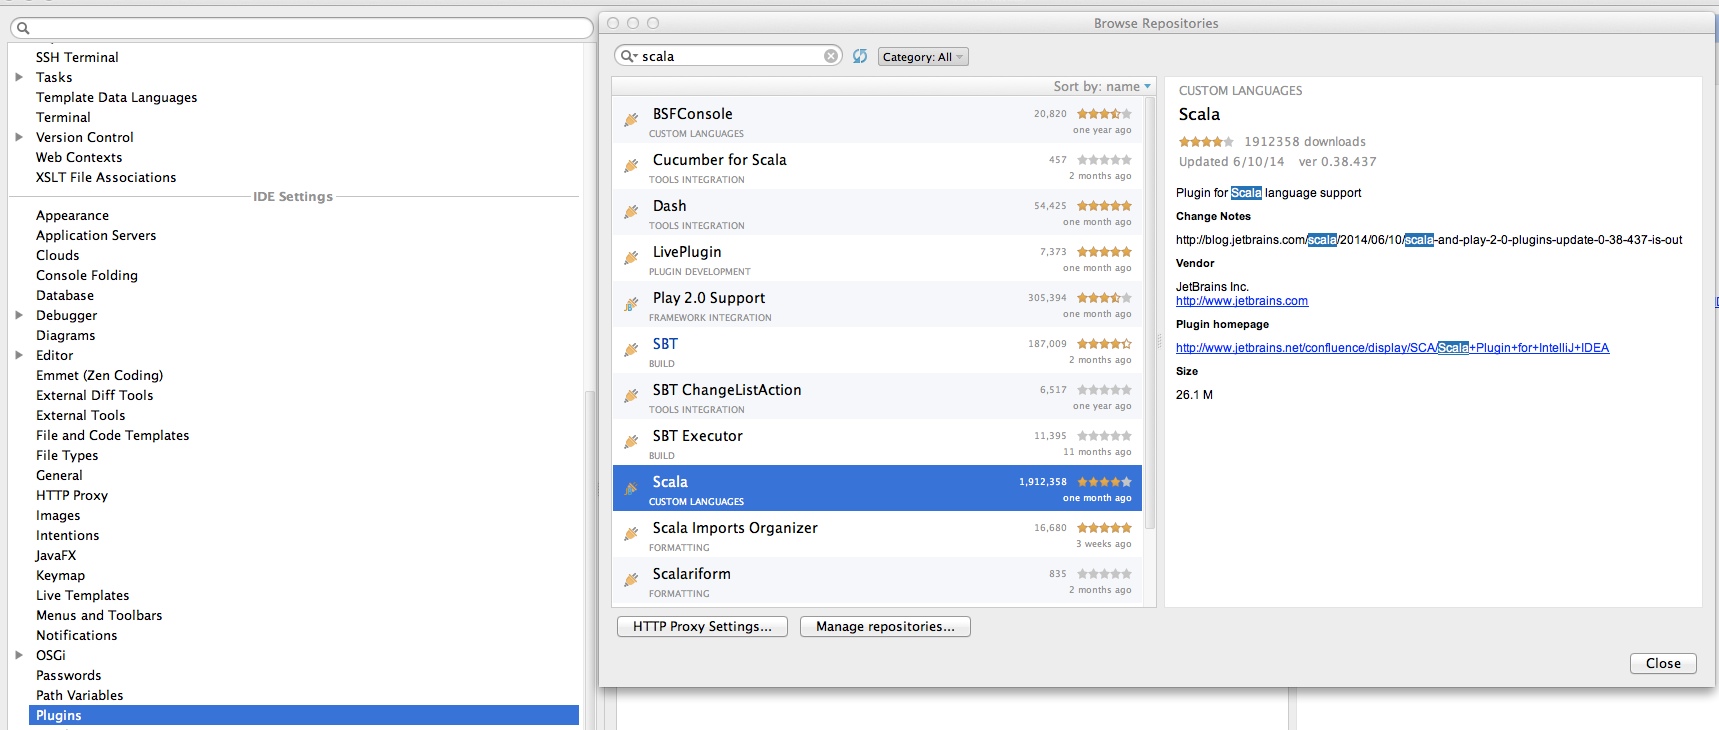
Install the Scala and SBT plugins for IntelliJ:
You’ll need to restart IntelliJ for the changes to take effect. Go to Preference->IDE Settings->Plugins->Browse Repositories. Search for “Scala” and “SBT” and install them both. The SBT plugin is optional, but it just makes life much easier.
Create a new intelliJ project:
In the New Project dialog window, select Scala and choose “SBT”

Define the web.xml file:
Create a webapp/WEB-INF directory under src/main and add a web.xml file there. This file is a carry over from Java, which uses the web.xml file for servlet configuration. In Scalatra, web.xml is still utilized, but its role is much diminished. All that’s needed here is a definition for our listener class:
<?xml version="1.0" encoding="UTF-8"?>
<web-app xmlns="http://java.sun.com/xml/ns/javaee"
xmlns:xsi="http://www.w3.org/2001/XMLSchema-instance"
xsi:schemaLocation="http://java.sun.com/xml/ns/javaee
http://java.sun.com/xml/ns/javaee/web-app_3_0.xsd"
version="3.0">
        <listener>
                <listener-class>org.scalatra.servlet.ScalatraListener</listener-class>
        </listener>
</web-app>
Configure the routes in ScalatraBootstrap.scala:
Create a ScalatraBootstrap.scala file under src/main/scala, which will contain the bulk of your application configuration code. The design philosophy seems to favor using code over XML, a pattern that we will see repeated later when we see how SBT handles plugins and dependencies. The ScalatraBootstrap file is where our route definitions will go. Since we’re keeping things simple, we will specify a “sample” endpoint underneath the website route and then map it the yet to be implemented servlet, GreetingController, that services it.
import javax.servlet.ServletContext
import org.scalatra.LifeCycle

import sampleApi.controllers.GreetingController

class ScalatraBootstrap extends LifeCycle {
  override def init(context: ServletContext) {
    // Mount servlets.
    context.mount(new GreetingController, "/sample/*")
  }
}
Implement the GreetingController servlet:
Here is where we will implement our HelloWorld endpoints. Create a sampleApi.controllers package under src/main and add a GreetingController.scala. Note that its customary to put the API endpoints under a controllers package, but not necessary for the implementation.
package sampleApi.controllers
import org.scalatra.ScalatraServlet

class GreetingController extends ScalatraServlet {
  get("/") {
    "Hello world"
  }

  get("/:name") {
    val name = params.getOrElse("name", "world")
    "Hello " + name
  }
}
Two HTTP GET routes are defined one that accepts a “name” query string parameter, and one that doesn’t. Both are mapped to the root of application (in our case this would be http://localhost:8080/)
Add dependencies in build.sbt:
Now edit the build.sbt file under the project root. Here is where we manage all our package dependencies. Modify build.sbt so that it contains the following code (you can safely override the default auto generated file provided by IntelliJ)
libraryDependencies ++= Seq(
  "org.scalatra" %% "scalatra" % "2.2.2",
  "org.eclipse.jetty" % "jetty-webapp" % "8.1.7.v20120910" % "container,compile",
  "org.eclipse.jetty.orbit" % "javax.servlet" % "3.0.0.v201112011016")

Seq(webSettings :_*)
libraryDependencies is a variable declared in keys.scala that stores all the managed dependencies. “++= Seq” appends our list of dependencies to the variable. Each dependency uses the same groupID % artifactID % revision format that Maven does. The main difference here is that instead of using XML to specify the dependencies in a pom file, Scala code is used instead. Again, the design philosophy seems to favor the expressiveness and flexibility of code over that of XML.
IntelliJ will prompt you to re-import your project. Enable auto-import to save you some clicks in the future:

Add Jetty plugin to SBT:
We are still missing one more dependency in order to get our application to run successfully. We will want to launch our application from SBT by running it inside a Jetty web container, which is basically just a wrapper for tomcat. SBT plugins are managed in the project/plugins.sbt file. Note that plugins.sbt manages all the SBT plugins, and build.sbt manages all the dependencies for the actual application itself. Add the following line:
addSbtPlugin("com.earldouglas" % "xsbt-web-plugin" % "0.7.0”)
Launch the application:
Your project structure should look like the following:
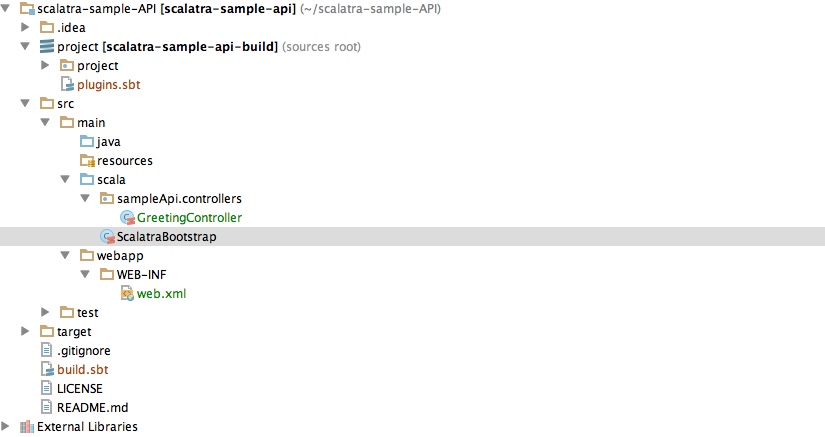
Go to View->Tool Windows->SBT Console. Hit the green arrow button to launch SBT. It will load the project definition and update the dependencies automatically. Once SBT has finished loading, you should see a “success” message followed by a command prompt. Type “container:start” to launch the jetty web server:

You can now can open up a browser and point it to “localhost:8080/sample” and see “Hello world”. Congratulations!
References
Great guide but it does some things that aren’t standard. Namely, it uses a pom file to manage dependencies and launches the application by manually spinning up a jetty server in code instead of using SBT.
https://github.com/laurilehmijoki/sbt-scalatra-skeleton
A simple HelloWorld API with JSON output, complete with a working test and instructions on how to launch the application.
http://www.scalatra.org/2.3/guides/deployment/configuration.html
Official documentation outlining how to setup your API
It’s great you guys are more into these up-to-date technologies, but I woduln’t overdo with calling Scala, Scalatra and MongoDB the bleeding edge They were quite new 2-3 years ago, now it’s more like a safe option